- Author Lauren Nevill nevill@internetdaybook.com.
- Public 2023-12-16 18:48.
- Last modified 2025-01-23 15:15.
Today we will take care of making a small picture - an avatar that will be useful to you if you communicate on forums or on social networks. Of course, you can download some simple ready-made avatar on many sites. But if you want your avatar to look original or unusual, reflecting your personality, then you can make it yourself.

Instructions
Step 1
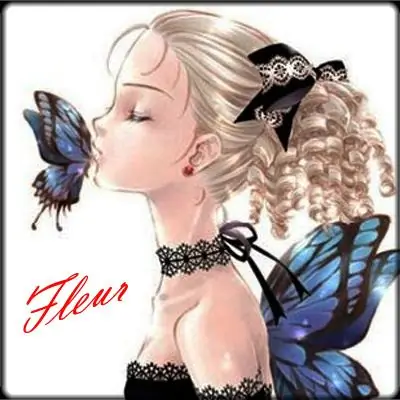
In this article we will look at several simple ways to create avatars, but remember that the recommended picture size is 100x100 pixels. Therefore, we will first make the original picture square, and then we will modify it with the help of various effects. We'll start by opening the image in Adobe Photoshop. In this tutorial, the picture is taken from a stock photography site, anime genre.
Step 2
First of all, you need to unpin the layer. To do this, click on the lock in the "Layers" window with the left mouse button and drag it to the basket without releasing the key.
Step 3
After unpinning the layer, resize the canvas using the Resize Canvas command. This can be done using the main menu "Image" by selecting the item "canvas size", or by right-clicking on the window with the image.
Step 4
We did these simple steps to make the image square. In this example, the original picture size of the picture 400x531px is changed to a new size of 400x400px.
Step 5
After these actions, a window should be displayed with the inscription: "The new canvas size is smaller than the previous one; part of the image will be clipped."
Step 6
Click "Continue". We get a square picture. In this example, the top of the image is cropped, but this is not the final result. So let's move on to the next step.
Step 7
To move the resulting image, use the Move tool.
Step 8
Now we move the picture to the desired position (I moved the image down a bit so that you can see the whole girl's head and hair).
Step 9
In principle, this result can be achieved. Let's remember what we talked about at the very beginning: the size of a picture for an avatar should be no more than 100x100px. If you are satisfied with the result, you can reduce the size of the image. If you are still in the mood to experiment with the effects, you can do it later. Change the image size as follows: main menu "Image" - item "Image size" - set the image size to 100x100px. At the same time, pay attention to the fact that there is a tick in front of the "Maintain proportions" item. Now it remains to save the image in the required format ("File" - "Save As"). The format can be chosen, for example, jpg.
Step 10
If you nevertheless decided to experiment a little, let's try, for example, to make a beautiful inscription on the picture. This is done using the tool in Photoshop "Horizontal (or vertical) text" located on the toolbar. You can change the size, color, font type and other parameters of the text in the appeared toolbar, which can be seen under the main menu of the program. There you can also find a text warp icon.
Step 11
And you can make a beautiful frame for the picture. The frame in this picture was made using the site "photo frames online" - https://www.avazun.ru. You just need to select a frame, upload a picture, correct it (if necessary), click "Next" and "Save"
Step 12
There is a large selection of special effects on the site https://fotoflexer.com. First, press the "Upload photo" button, upload your picture or photo, and then choose the special effects you like. By the way, in the same place you can create an inscription on the picture, choose a frame, add stickers to the picture (butterflies, hearts, etc.), play with the color of the picture (the effect of bronze, old photo, negative, etc.)
Step 13
Of course, there are many more ways to create avatars, so don't be afraid to experiment while creating your masterpiece and enjoy the result!


