- Author Lauren Nevill [email protected].
- Public 2023-12-16 18:48.
- Last modified 2025-01-23 15:15.
As you know, website files can be uploaded to hosting using the control panel. But it should be noted that this method is not very convenient. It is much more convenient to upload files using a special manager, such as FileZilla, which works with ftp. FTP is a protocol that allows you to transfer files from your computer to a server and vice versa. FileZilla is the most convenient and accessible FTP client, and it is the procedure for working with it that we will consider in this article.

Instructions
Step 1
First of all, choose a hosting and register an account on it - this will be your first step. After this registration, a letter should come to your mail. This letter will contain all the necessary data - login, password and IP. With the help of this data, you will configure the program.
Step 2
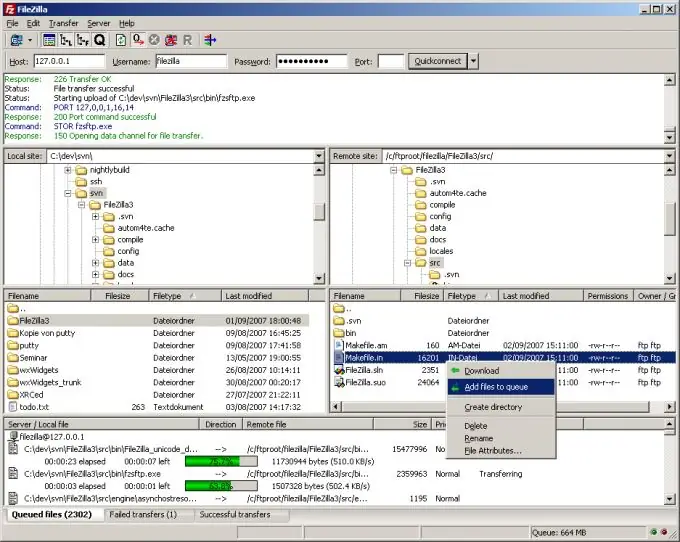
Download the latest version of FilleZila. Install it on your computer and run it. Select "Open Site Manager" in the upper left corner of the program. Now, in the window that appears, enter the name of the site, and then enter the data that came to your mail - login, password and IP-address.
Step 3
In the "Host" field, write the IP, in the "User" field - enter the login, fill in the "Password" field, and in the "Type" field of the entry, select "Request password" - this will be more convenient. Now confirm all changes.
Step 4
Now find the button with the black arrow next to the Open Site Manager button. Click on it and select the connection you created in the menu that appears, enter your password and select the connection to the server.
Step 5
After that, the program will connect to your hosting. In this case, on the right side of the program you can see files and folders that are located on the FTP server, and on the left side - files located on your computer.
Step 6
Now start uploading your site to hosting. Open the root folder in the right part of the program, open the folder in the left part that contains the site engine files. Now select all the files on the left and upload them to the hosting, either by dragging and dropping or using the "Download" command. The files will be downloaded to the folder that will be open at that moment. Wait while all the necessary files are downloaded.
Step 7
Now start installing the engine. Keep in mind that in the future you will have to delete some files (to do this, you will need to right-click on the required file and select "Delete") or change access rights (to do this, click on the required file and select the appropriate command). Good luck with your work!


