- Author Lauren Nevill [email protected].
- Public 2023-12-16 18:48.
- Last modified 2025-01-23 15:15.
In order for computers to work successfully in a network, be it a local network or the Internet, it is necessary to correctly configure the network parameters. Settings can be made manually, but it is much more convenient and reliable to entrust it with special Windows tools.

Instructions
Step 1
For networks with TCP / IP, the DCHP (Dynamic Host Configuration Protocol) protocol has been developed. It assigns IP, DNS and WINS addresses to computers that are on a given network segment. The server must have a network version of Windows - NT installed. From the Start menu go to the Control Panel and double-click to activate the Network option. ("Net"). Select the Services option and click the Add button. Find Microsoft DHCP Server in the list of services and confirm your selection by clicking OK. Confirm server restart.
Step 2
In the Administrative Tools group, start the DHCP Manager. Select Scope and Create from the main menu. In the Start Address and End Address fields, specify the first and last IP addresses of the subnet address range and Subnet - the subnet mask. In the Excluded Addresses box, enter addresses that should not be assigned - for example, IP printers that do not support DCHP.
Step 3
Set the lease term in the Lease Duration section in the Limited To box. This protocol distributes addresses to computers on the network for a time that is determined by the network administrator. You can assign an IP for unlimited use, but this does not exclude complications: if the computer is removed from the network, the network address assigned to it cannot be transferred to another user. After half of the lease ("lease") period of the network address, the DCHP client sends a request to renew it. If no response is received, a second request is sent after half of the remaining time, then again, and so on.
Step 4
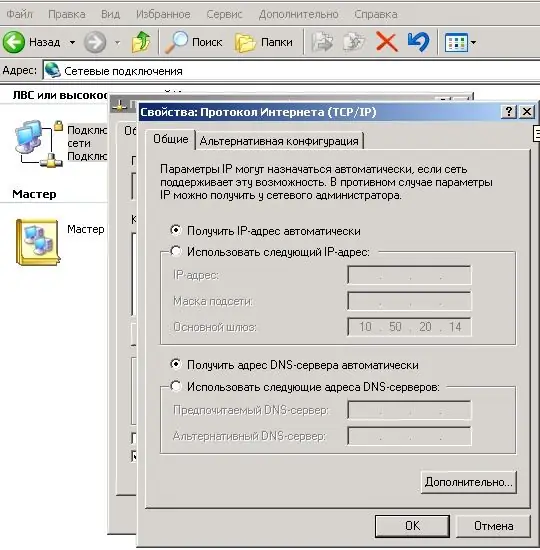
Confirm your selection with OK. After closing the dialog box, you can activate the address range at once, or first define all ranges of your network, and then activate all at the same time. A yellow glowing lamp will appear to the right of the activated ranges. On the DCHP client (the computer the user is using), you must specify that the IP will be obtained automatically.
Step 5
If you need to set the IP address manually, on the client computer through the "Control Panel" go to the "Network Connections" folder. To open the context menu, right-click on the network connection icon and select the "Properties" option. Check Internet Protocol (TCP / IP) and click Properties. Activate "Use the following IP address" and fill in the fields in the sections for determining the IP address and DNS servers.


