- Author Lauren Nevill [email protected].
- Public 2024-01-11 01:04.
- Last modified 2025-01-23 15:15.
Today, MMORPGs occupy a prominent place in the gaming world. This type of games attracts people, first of all, by the possibility of competing with other people. Social interaction plays a key role in modern MMORPGs. This naturally manifested itself in the form of guild systems, clans and alliances, implemented in almost all MMO games. Formally, a clan is a mechanism for forming an in-game community. But usually people are not limited to interaction only in the game. Therefore, developing communities, as a rule, acquire their own website and forum. There are even specialized web services that provide free hosting for clans. Therefore, today clan leaders do not need to think about how to create a clan site. You just need to register an account and use ready-made tools.

It is necessary
Modern web browser
Instructions
Step 1
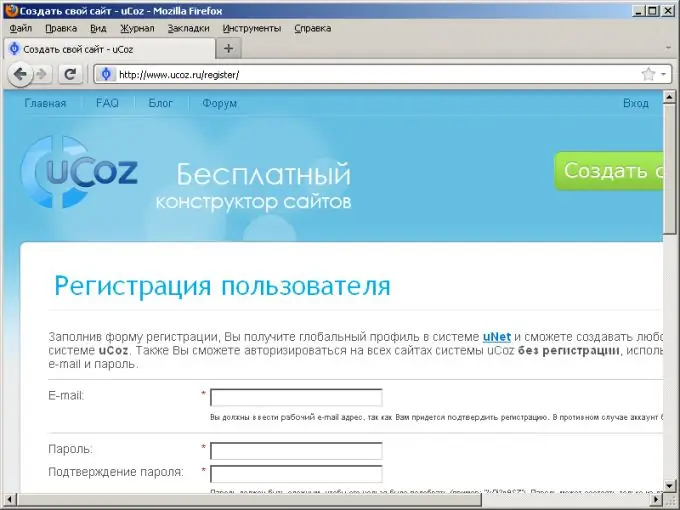
Register an account on the free hosting service for clans. Open the page in the browser https://clan.su. Click on the "Register" link. A new page with a form will open. Fill in the required fields. Click the "Register" button
Step 2
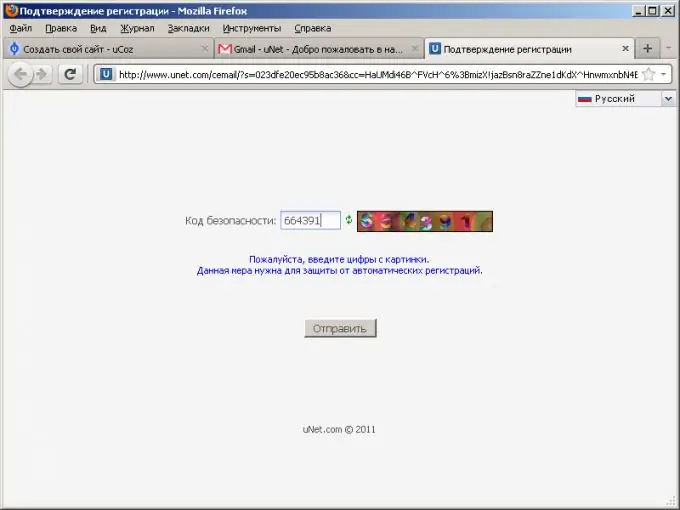
Confirm your account registration. An email with a confirmation link will be sent to the email entered during registration. Open the link from the email in your browser. On the loaded page, enter the code from the image. Click the "Submit" button.
Step 3
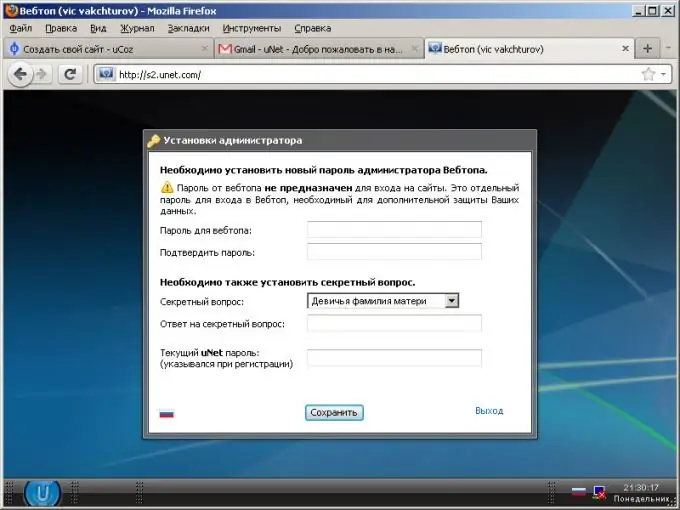
Enter your account administrator credentials. On the page displayed, fill in the required fields. Click the "Save" button.
Step 4
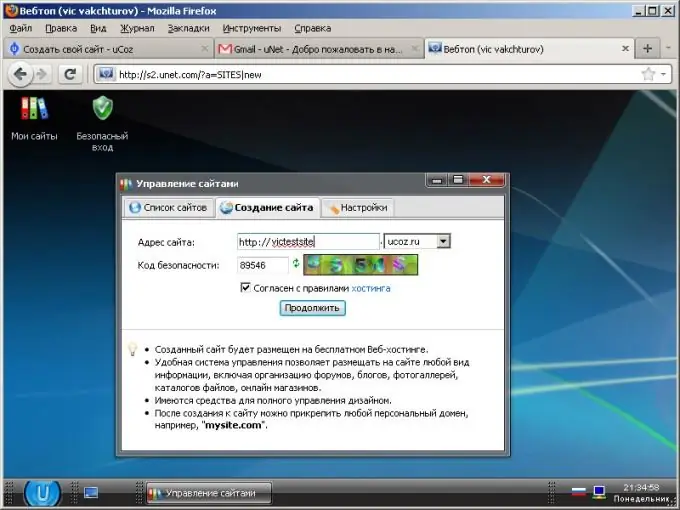
Create a clan site. In the "Site Management" dialog, go to the "Site Creation" tab. Enter the site address and select its domain. For a clan site, it makes sense to choose an address on the clan.su domain. Enter the code from the image. Click the "Continue" button.
Step 5
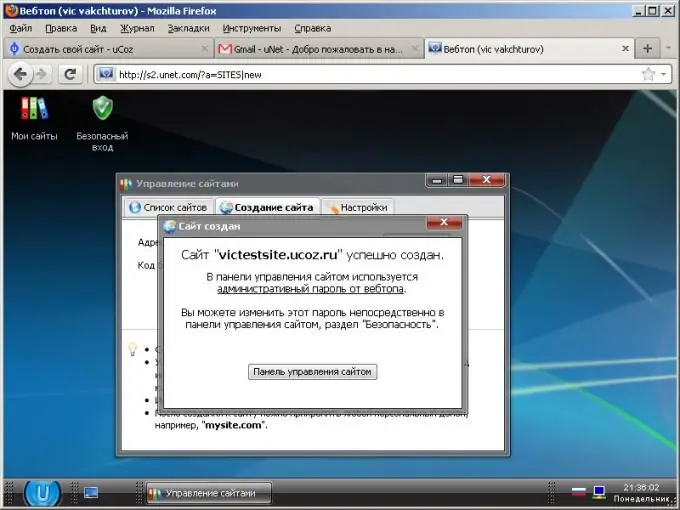
Go to your site's dashboard. In the dialog with the message about the successful creation of the site, click the "Site Control Panel" button.
Step 6
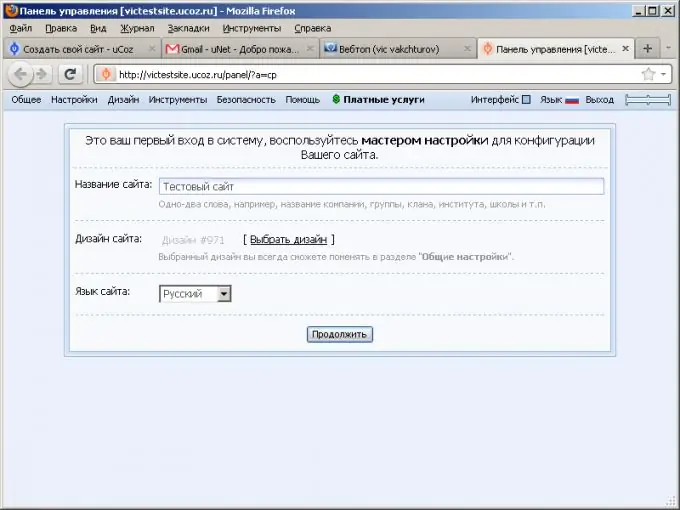
Enter the basic parameters of the site. On the page that opens, select the name, design and language of the site interface. Click the "Continue" button.
Step 7
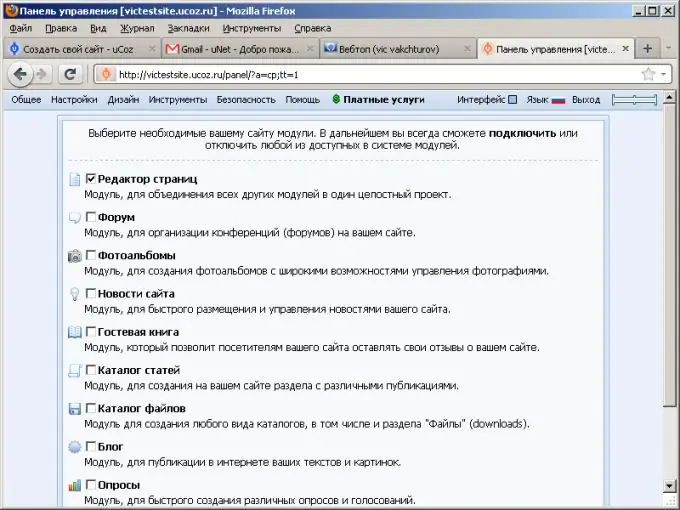
Activate the modules that will be used on the site. To get started, you can select a few commonly used modules such as Page Editor, Forum, and Site News. Click the "Continue" button.
Step 8
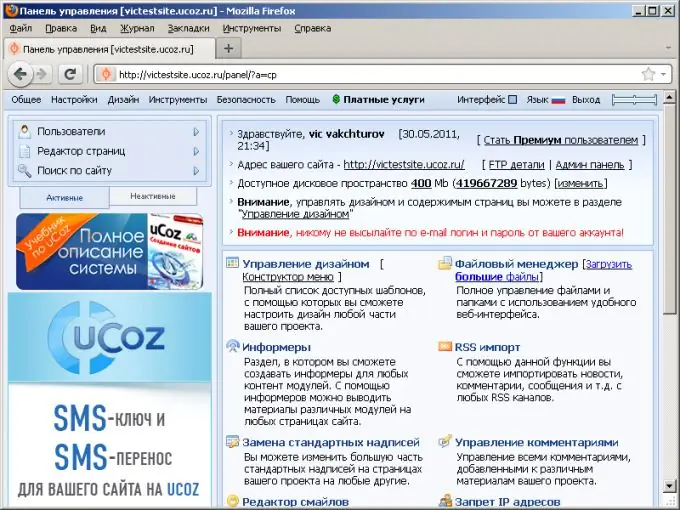
Complete the final site setup. The current page is the main page of the site's control panel. Customize design elements, modules, sections of the site using the control panel menu. Save your changes.
Step 9
Check the site is working. Open the website address in your browser. Make sure the site is up and running.


