- Author Lauren Nevill [email protected].
- Public 2024-01-11 01:04.
- Last modified 2025-01-23 15:15.
The problem of assigning administrator rights to a user account is specific to the Microsoft Windows 7 operating system, since the built-in elevated Administrator account is disabled in it by default.

Instructions
Step 1
Log on to the system with the administrator account created during OS installation, and open the context menu of the "Computer" desktop item by right-clicking the mouse to enable the built-in Administrator account with elevated rights.
An alternative way to carry out this procedure can be pressing the "Start" button to call the main menu of the system and go to the "Control Panel" item, with sequential disclosure of the "Administrative Tools" and "Computer Management" nodes.
Step 2
Select the "Management" item and go to the "Utilities" item on the left side of the console that opens.

Step 3
Select the Local Users and Groups section and expand the Users link.
Step 4
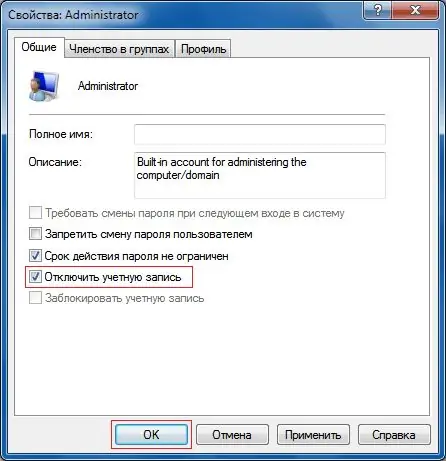
Double-click the Administrator account in the right pane of the management console user directory and uncheck the Disable account box in the new properties dialog box.

Step 5
Confirm the execution of the command by pressing the OK button and return to the main menu "Start".
Step 6
Specify the "Log out" command and use the Administrator account that appears to re-enter the system.

Step 7
Call the main menu by clicking the "Start" button and go to the "Control Panel" item.
Step 8
Select User Accounts and select Administrator.

Step 9
Select the Create Password option and enter the desired value.
This action must be performed in order to comply with the safety rules for working with a computer! Do not use the option to disable password protection for the selected account, as all applications will be launched as the computer administrator, which can lead to uncontrolled work of malicious software.


