- Author Lauren Nevill nevill@internetdaybook.com.
- Public 2023-12-16 18:48.
- Last modified 2025-01-23 15:15.
Long gone are the days when network connectivity was a difficult and time-consuming process. Today, almost everyone has the Internet, and its setup and installation has been simplified to the maximum. Setting up an automatic Internet connection on your computer in the Windows XP operating system is very easy - even a novice PC user can do it. Follow our instructions to create an automatic network connection.

Instructions
Step 1
To get started, go to Start and open the Control Panel. Go to the section Network and network connections. Select a PPPoE connection from the proposed connections and open its properties.
Step 2
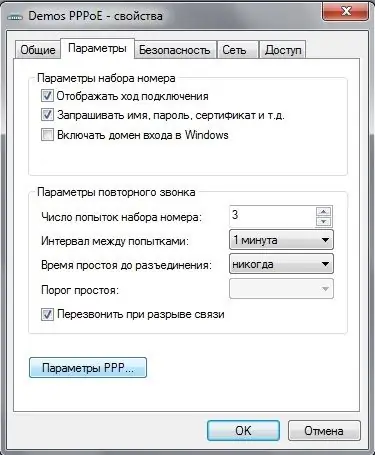
In the properties of the connection, open the parameters and uncheck the box next to Prompt for username and password. Click OK and then right click on the connection and click Create Shortcut.
Step 3
Open the Startup folder on the C drive in the Documents and Settings section and move the created connection shortcut to it. When the operating system is loaded, the Internet connection will turn on automatically.
Step 4
You can also open the "Start" tab "All programs, then open" Accessories, then - "Service" and go to the section "Scheduled tasks. Select the item "Add task and set your shortcut to the network connection on it.
Step 5
Check the box "When the computer boots, click" Next and "OK. This action will also start your connection every time the system is restarted.
Step 6
To ensure uninterrupted communication, open the network connections section in the control panel again and go to the properties of the created connection.
Step 7
Open the parameters tab and put a tick on the “Call back on disconnection. Click OK to confirm your changes. This will allow the Internet to recover quickly in the event of a disconnect.


