- Author Lauren Nevill nevill@internetdaybook.com.
- Public 2024-01-11 01:05.
- Last modified 2025-01-23 15:15.
Information on the site is usually placed in the administration panel. Dealing with its placement is quite simple, and you do not need to know programming languages. There are several subtleties to consider when adding information. Let's consider them on the example of a site powered by Joomla.

It is necessary
Access rights to the site admin panel
Instructions
Step 1
We go to the administration panel. If the site is hosted, you must type https:// site domain / administrator and press enter. A login form will appear on the monitor, where you need to enter your login, password and click "Login".
Step 2
In order to place information on the site, you need to left-click on the "Add Material" icon.
Step 3
The "Material: create" window has opened before you.
The material is written for specific search queries. Do not forget about this, otherwise, users simply will not be able to get to the site from search engines.
We start adding information to the site. Fill in the "Title" field. It must be filled in according to the required keyword or phrase. Be sure to prescribe the alias of the material. This is the same Russian name, only in Latin letters.
We select the section and category in which the material should be published and proceed to writing the article. You can write directly in the visual editor. Do not forget to write meta tags (keywords or phrases for which the article was optimized), this will help attract visitors to your resource.
Step 4
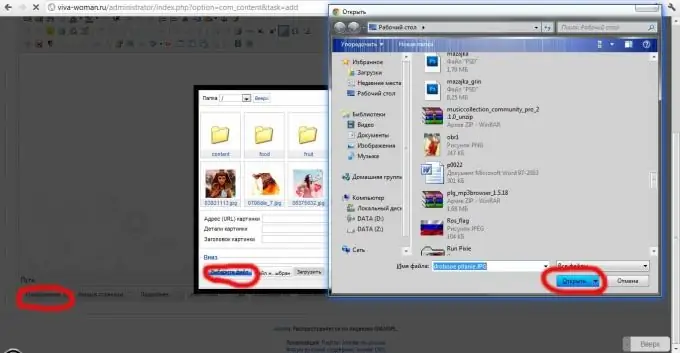
First, let's insert a picture into the material. After all, without a picture, the article will not look very attractive. At the bottom of the text box, you will see an Image button. When you click on it, a pop-up window will appear where you will be prompted to select a file. By clicking on the "Select file" button, another pop-up window will appear, where you need to select the location of the file and its name. When the required file is found, press the "Open" button.

Step 5
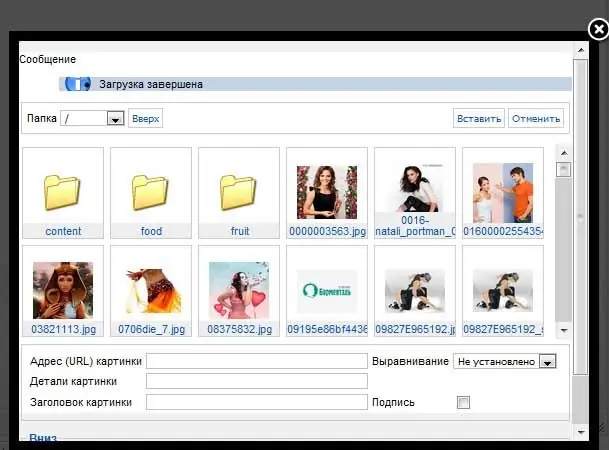
If you did everything correctly, in the gray box at the top, you will see the message "Download completed", or an error message.

Step 6
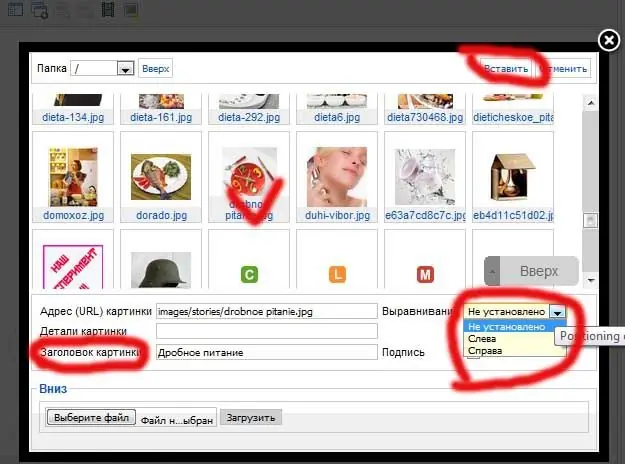
Now choose a picture from all those in your gallery. When you find the uploaded image, click on it with the left mouse button, fill in the "Image title" field below, select "Alignment" (the location of the image in the material). Then click "Insert".

Step 7
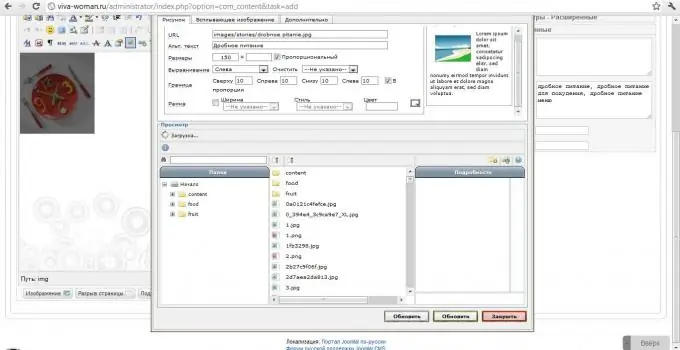
Now a few more actions with the picture. They must be performed so that the text from the picture is slightly indented, and it has alternative text (some, saving traffic, turn off the display of pictures). You also need to make indents on each side and set the size of the image. When all the settings have been made, click the "Apply" button.

Step 8
Now we insert the text of the article, not forgetting about the keywords and phrases written in the meta tags. When the text is written, you read it carefully again, you can post information on the site by clicking the "Save" button


