- Author Lauren Nevill nevill@internetdaybook.com.
- Public 2023-12-16 18:48.
- Last modified 2025-01-23 15:15.
Bright and attractive visual advertising on the Internet is a guarantee that your product or your service will be noticed and appreciated. A high-quality and beautiful banner is necessary if you want to effectively promote your services and sites on the network - you can place a banner on any resource, both paid and free, and making such a banner is not at all difficult if you have Adobe Photoshop. An animated banner looks much more interesting than a static one, and you can use a simple Ulead

Instructions
Step 1
Open Adobe Photoshop and determine the size of the future banner - for example, you can make a banner in the standard format 468x60 pixels. Find suitable images or logos to include in your banner, colors and fonts.
Step 2
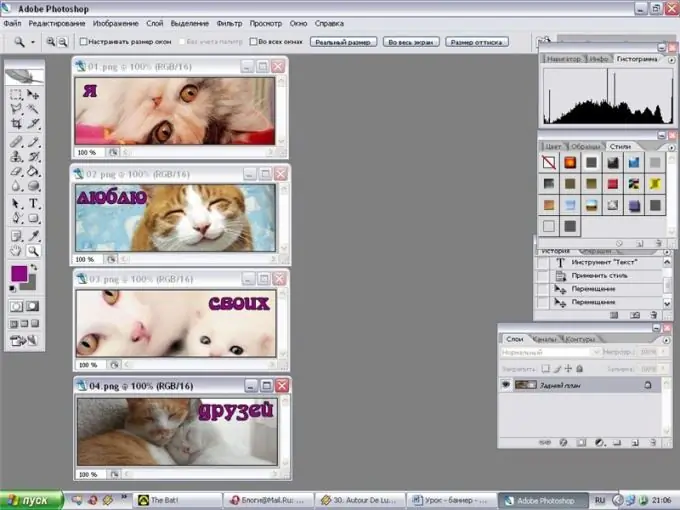
Determine what exactly you will write on the banner, and what elements of it will be animated. Create a new document of the desired size with a transparent or white fill, and then place the images and illustrations of your choice on the surface of the new file, placing each graphic element on a new layer. Surround the banner with a thin border. Thus, create one of the frames of the future animation.
Step 3
Now make the layers of the first frame invisible by clicking on the icon with an eye on each of the layers and start creating the second frame. Make the required number of frames, on each of which the location of the graphic elements, as well as the text, will change. For example, in the first frame, you can include the first part of the ad copy, and in the second - the second part.
Step 4
In the last frame, include the site address and contact information. Divide the frames into layers, and then, hiding unnecessary layers for each specific frame, save them one by one in
Step 5
To do this, open the Ulead
Step 6
Set the appropriate frame rate and delay time for each frame, and then set the order in which the frames appear in the animation. Duplicate some frames if necessary, making copies.
Step 7
Click the preview button to see how the finished animation will look online. If you are happy with everything, save the banner in


