- Author Lauren Nevill nevill@internetdaybook.com.
- Public 2023-12-16 18:48.
- Last modified 2025-01-23 15:15.
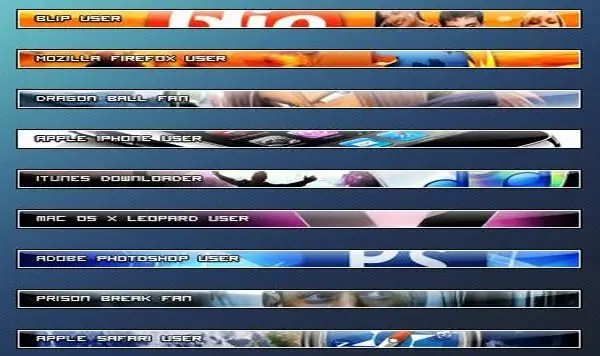
A userbar is a graphical image placed in forum signatures to identify membership of different interests, beliefs, or groups. Such an image can be made using animation.

Instructions
Step 1
Start Photoshop. Create a new object of the required size by clicking “File” and “New” if you are using the Russian version, or “File” and then “New” if you have an English version of the program. Fill the document with black by clicking Edit, Fill, and Black.
Step 2
Click on the "Rectangular Marquee Tool" and make a selection so that near all the edges there is an unselected area with a thickness of one pixel. Delete the selection by pressing "Delete" on your keyboard. Deselect the selection by pressing Ctrl + D. Create a new layer by clicking the "Layer", "New", "Layer" tab ("Layer", "New", "Layer"). In the layers panel, place a new object below the frame layer. Make the moved layer active and fill it with gray by clicking Edit, Fill, 50% Gray.
Step 3
Make a new layer, move it in the objects panel above the gray fill layer. Fill the created layer with any color you like. Click on the object with the right mouse button and go to the "Blending Options" menu. In the window that opens, click on the "Gradient Overlay" item and set the values: "Mode" - "Hard color" ("Blend mode" - "Hard Light"), "Transparency" - "45%" (" Opacity - "45%"), "Gradient" - "Metal" - "Steel Bar" ("Gradient" - "Metals" - "Steel Bar"). Click Ok.
Step 4
Create a new layer and place it after the frame layer. Fill it with any color. Go to "Blending Options" and under "Inner Glow" set the parameters: "Mode" - "Linear light" ("Blend mode" - "Linear Dodge"), "Opacity "-" 100% "(" Opacity "-" 100% ")," Color "-" White "(" Color "-" White ")," Size "-" 4 "(" Size "-" 4 ") …
Step 5
Create a new 1 by 2 pixel object. Select "Brush" ("Pencil Tool"). Reset the colors by pressing the "D" KEY. Place a point at the top pixel of the document, press "Edit" - "Define Pattern" - "Ok" ("Edit" - "Define Pattern" - "Ok"). Close the file without saving it and go to the document with the userbar.
Step 6
Create a new layer, place it above all layers except for the object with a frame. Fill a new layer with the created texture. To do this, click "Edit" - "Fill". Click on the "Pattern" button. Select your texture: it should be the last in the list ("Edit" - "Fill", "Use" - "Pattern", "Custom Pattern" - click on it).
Step 7
Select the Horizontal Type Tool. Write the desired inscription of the appropriate size, using the font from the list of available ones.
Step 8
Connect the bottom three layers. To do this, in the layers panel, click on the eye icon next to the layers that cannot be merged, making them invisible. Select "Layer" - "Merge" ("Layer" - "Merge Visible").
Step 9
Create a new layer, it should be placed above the bottom one. Create animation on this layer. To do this, duplicate the layer by clicking "Layer" - "Duplicate" ("Layer" - "Duplicate Layer"). On the duplicate go to the "Blending Options" and set the values: "Mode" - "Lighten" ("Blend mode" - "Lighten"). Open the animation window by choosing Window> Animation. Make the required number of duplicate frames, set the layer visibility and the required time.
Step 10
Save the resulting userbar by clicking "File" - "Save for Web".


