- Author Lauren Nevill [email protected].
- Public 2024-01-31 09:18.
- Last modified 2025-01-23 15:15.
There are a large number of lessons on the Internet that teach how to create banners, but they often require in-depth knowledge of various capacious programs, which are quite complicated for a novice web-master. If you want to make a colorful banner quickly and in an uncomplicated way, the standard graphics editor Paint, which is included in the Windows OS assembly, will help you with this.
It is necessary
- standard Paint program,.gif" />
Instructions
Step 1
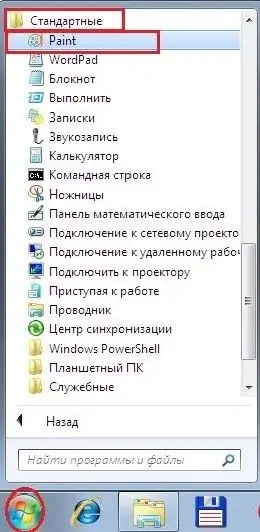
From the Start panel, select All Programs, then Accessories. Click the Paint program to open it.
Step 2
To make the banner interesting and effective, you can download several options for images in advance on the topic you need. Choose the most suitable one that will advertise your product or service.
Step 3
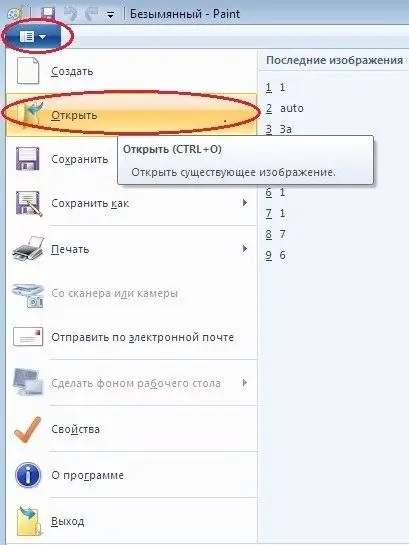
To load the selected picture into the Paint editor, click on the icon in the upper left corner, then select "Open".
Step 4
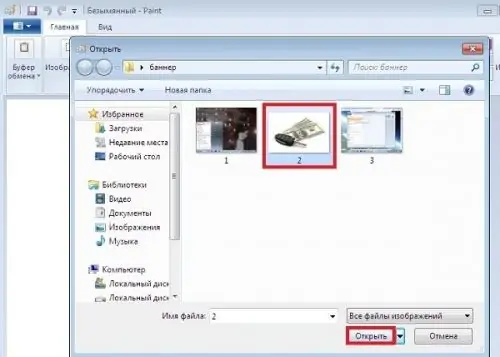
In the opened file browsing tab, find the selected image, select it and click "Open" (or just double-click on it).
Step 5
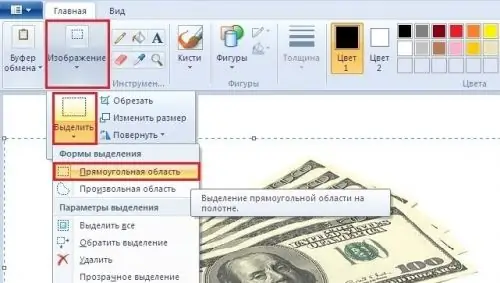
Select the main information element of your image: "Image" - "Select" - "Rectangular area" (or using the cursor).
Step 6
Give the selected element the desired shape by moving the selection squares with the cursor. For example, you can slightly shift the image to the right to free up space for the inscription on the left side of the future banner.

Step 7
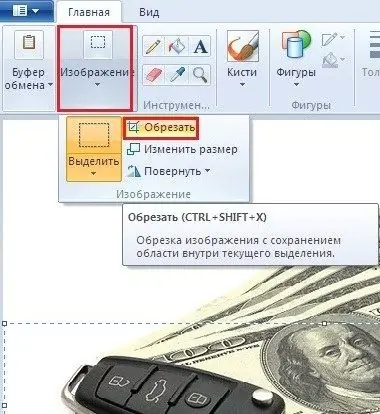
To crop the selection, click Image - Crop.
Step 8
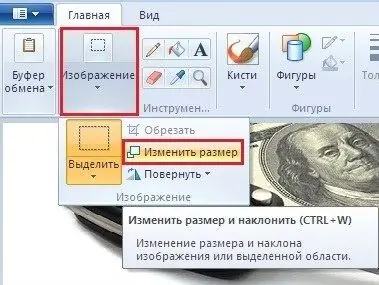
Resize the image: "Image" - "Resize".
Step 9
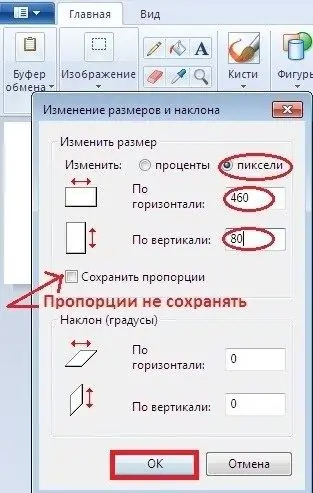
In the resize window, set the desired size in pixels in width and height. To set arbitrary parameters, uncheck the box next to the "Maintain aspect ratio" item.
Step 10
Click on the icon in the upper left corner - "Save As" - "Image in
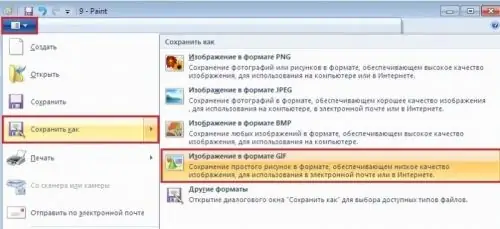
Step 11
In the window that opens, the "File type" line will be set to
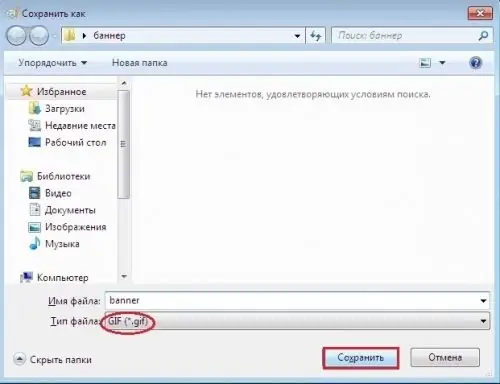
Step 12
To insert text information on the banner, activate the "Text" tool.
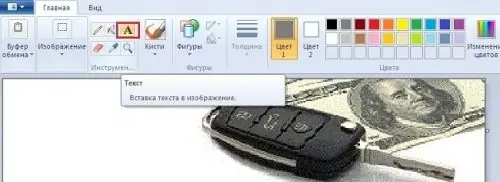
Step 13
On the text input toolbar, select the desired font size, font, color, type, and location. Stretch the text box to the desired length and width, and enter your text.
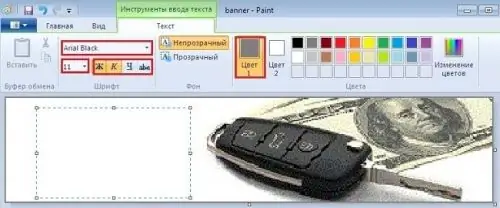
Step 14
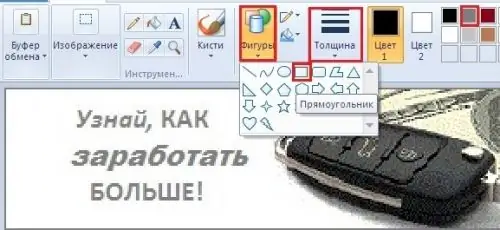
You can add any additional elements to the banner. Or, for example, arrange it into a frame: "Shapes" - "Rectangle" - select the thickness and color of the frame - drag the frame along the edges of the image with the mouse cursor. Then save the file again, but with a different name.
Step 15
Now we need to create another file with different text. Open the first saved file (without text information) and add new text and other elements to it as described above. Alternatively, just erase the previous text with the eraser to add a new one (if the background is white). If the background is of a different color, click it with the eyedropper and paint over the text with this color. Save the finished banner as described above.

Step 16
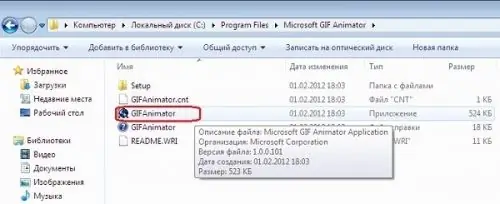
So, you have at hand two identical files with different text. These will be two layers that need to be merged to keep the banner text constantly changing. This operation can be easily done in a small program for creating animated GIFs MS
Step 17
After installing the program on your computer, open it with a double click.
Step 18
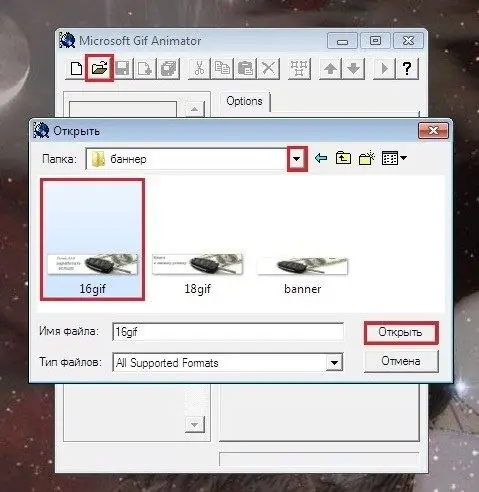
In the
Step 19
Open the first layer with the Insert / "+" (or Ctrl + I) add tool.
Step 20
Group the layers with the Select All tool (or Ctrl + L).
21
Go to the Animation tab and check the box next to Repeat forever and Looping.
22
In the Image tab, set the frame rate - for example, 1/80, optimal.
23
Click the Preview tool (or Ctrl + R) to preview the result.
24
Save the banner using the Save tool (or Ctrl + S). Your banner is ready, now you can place it.


