- Author Lauren Nevill [email protected].
- Public 2023-12-16 18:48.
- Last modified 2025-01-23 15:15.
The Internet provides many perspectives and opportunities for communication - in particular, it allows you to upload photos to the network and share them with friends and acquaintances, wherever they are in the world. Photos posted on the network can be inserted into your blog, link to them, stored as a photo archive in unlimited quantities. You can upload photos to the Internet in various ways, and all of them are quite simple and do not require time-consuming.

Instructions
Step 1
Use free photo hosting sites to upload photos to the network. To store your photos, choose services that do not limit the storage period of photos, and also do not reduce their quality.
Step 2
Register on the photo service, if it requires registration, then select the section for uploading photos and indicate the path to the photos on your computer that you want to upload to the site.
Step 3
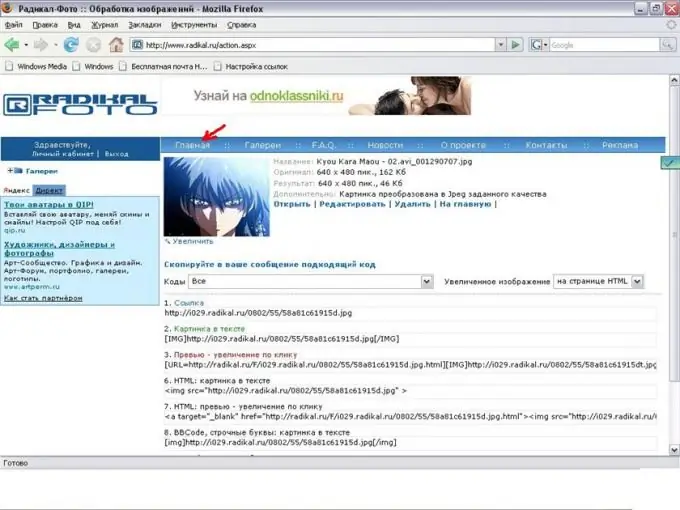
Some photo hosting sites provide the ability not only to upload photos, but also to edit them further - reducing the size, cropping, adding frames and effects. An example of such a hosting is radikal.ru. This site is used as a repository of their images and photos by a lot of users of forums and blogs.
Step 4
Open the site www.radikal.ru and specify the parameters of the photo you are uploading - uncheck or vice versa check the boxes on the list of settings
Step 5
You can specify to what size the photo should be automatically reduced when uploading.
Step 6
If you want to upload the photo in its original size, uncheck the "Reduce to" box.
Step 7
You can also optimize the format of the photo, rotate the photo by a certain angle, turn on the function of caption on the photo, specify the jpeg quality, and also make a preview and caption on the preview of the photo.
Step 8
After specifying all the settings, click "Browse", specify the path to the desired photo and click the download button.
Step 9
Copy the link you need to the preview of the photo or to the photo itself, and then paste the link where you were going to. This can be an email client, blog, personal site, forum, and so on.


