- Author Lauren Nevill nevill@internetdaybook.com.
- Public 2023-12-16 18:48.
- Last modified 2025-01-23 15:15.
An animated banner is one of the main means of promoting online advertising. In most cases, banners are placed on the websites of third-party companies, when you click on them, a transition to the advertised resource is realized. It takes a few minutes to produce a simple blinking banner consisting of three to four frames.

Necessary
install the Adobe Photoshop program on your computer
Instructions
Step 1
Create a new document in Adobe Photoshop with the specified width and height (File-New). The most common banners have the following dimensions in pixels: 468x60, 125x125, 120x90, 100x100, 120x60, 88x31. Set the Width and Height to 100. Open any picture in Adobe Photoshop, for example, an avatar, and copy its image to your document. This will create the first frame of your banner.
Step 2
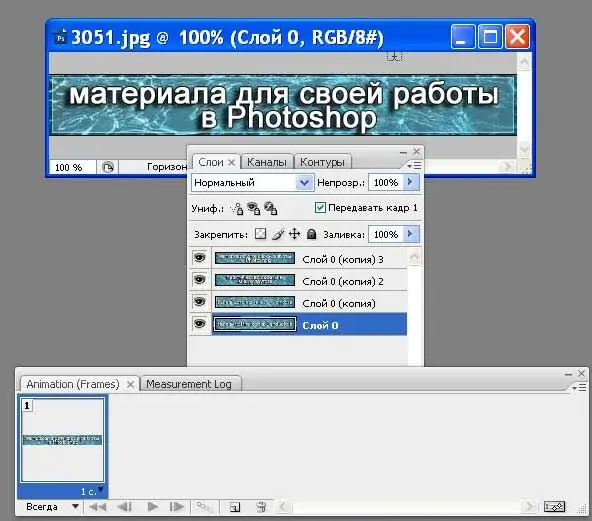
Pressing the Ctrl and J keys together, create the second layer of your document. Turn on the display of the second layer and turn off the display of the first one by clicking the eye in front of the corresponding layer. Press the key combination Ctrl and L and, moving the sliders, darken the second layer.
Step 3
Create an animated picture from the resulting two frames. To do this, open an animation window (Window-Animation). It will highlight your entire image, consisting of two frames, which will coincide with the darkened frame. Set the display time for it, for example, 0.5 s. Use the eye to select the first layer and turn off the second. Click the Duplicates selected frames button on the Animation (Frames) tab. The second frame will appear in the animation window. Choose a display time of 0.2 s for it.
Step 4
Save the resulting file in
Step 5
Check how your banner blinks when you press the Play Animation button. If necessary, adjust the display time of each frame before saving the animation.


