- Author Lauren Nevill nevill@internetdaybook.com.
- Public 2024-01-11 01:04.
- Last modified 2025-01-23 15:15.
The Indexing Service creates a database to speed up searches for files on disk or text within a file. But indexing is very resource intensive. To improve system performance, this service can be disabled.

It is necessary
access to the computer with administrator rights
Instructions
Step 1
If your operating system is Windows XP, follow these steps to disable the Indexing Service. If you have Windows 7, skip to step 5.
Step 2
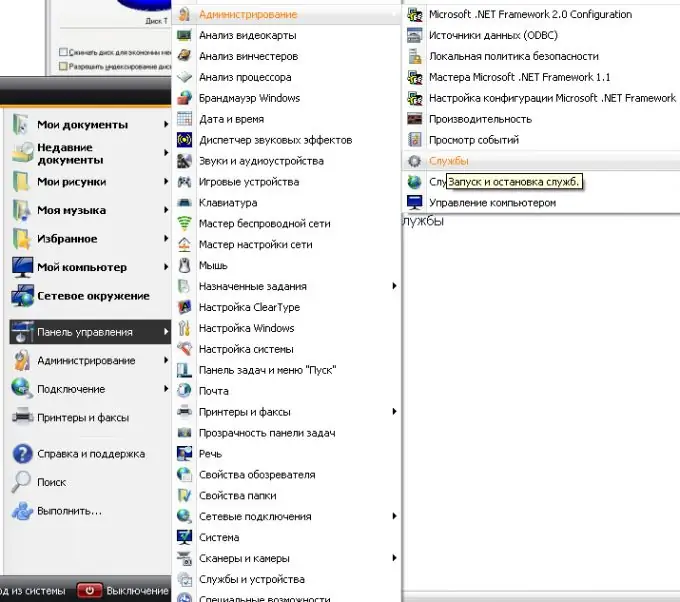
To disable the Indexing Service, click the "Start" button, select "Control Panel". Then select "Administration" and in the menu that opens, the item "Services".

Step 3
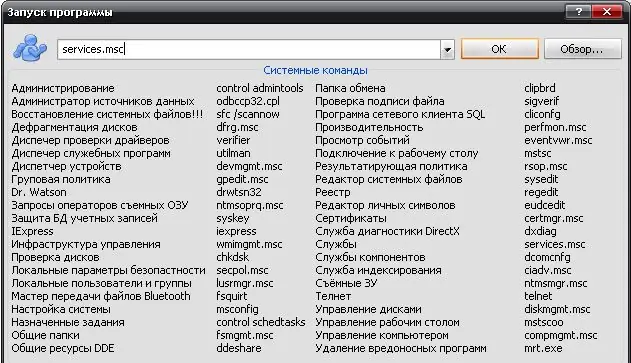
You can start Services in another way. Click Start, then Run. In the window that opens, type the command services.msc and press the Enter key.

Step 4
A window with system services will open. Find the indexing service in the list. Double-click the service name with the left mouse button. In the window that opens, click the "Stop" button to stop the execution of the service. Select the startup type "Disabled" and click the "Apply" button to prevent the service from starting after a system restart.
Step 5
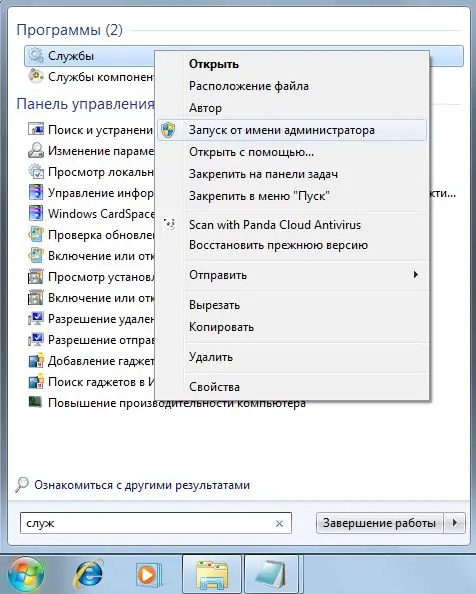
If your operating system is Windows 7, the procedure will be slightly different. Click the Start button, and in the Find text box, type services. A context menu will appear in which you need to right-click on the word "services". In the menu that opens, select the "Run as administrator" item. If prompted for a password, enter it.

Step 6
The system services window will open. Find the Windows Search service in the list. Double-click the left mouse button on the found line to open the properties of the service.
Step 7
In the window that opens, in the "General" tab, click the "Stop" button. In the "Startup type" list, select "Manual" or "Disabled", this will prevent the service from starting automatically at system startup.
Step 8
Open "My Computer", select each local and removable drive one by one and go to the properties of the drive. On the General tab, uncheck the box next to the Allow indexing the contents of files on this disk in addition to the file properties. Click the OK button.
Step 9
In the "Confirmation of attribute changes" window that opens, select "To disk *: (the selected disk) and to all subfolders and files". Click the OK button. The last two steps are required for each local and removable drive.


