- Author Lauren Nevill [email protected].
- Public 2023-12-16 18:48.
- Last modified 2025-01-23 15:15.
So, you have a desire to create your own computer game. You can take a more complex path, which involves learning the basics of programming in Delphi, C ++ and some other languages. However, this is a laborious process that takes a lot of time and effort. It is much easier to use constructors and ready-made game engines, most of which you can find on the website www.gcup.ru. Let's consider the creation of a game using the example of the Game Maker program
It is necessary
Game Maker program
Instructions
Step 1
The character
First, create a game character (let's call it, for example, obj_player). In order for him to learn to walk, in the "Left" button check the collision of objects and the shift along the X axis by coordinates -4. Do the same in the "Right" button, changing the coordinates to + 4. Don't forget about changing the sprites. Now our character can walk left and right.

Step 2
Platform
Create a new object (obj_platform), which will later become the platform. In this case, do not forget to check the Solid checkbox in obj_platform.
Step 3
Gravity
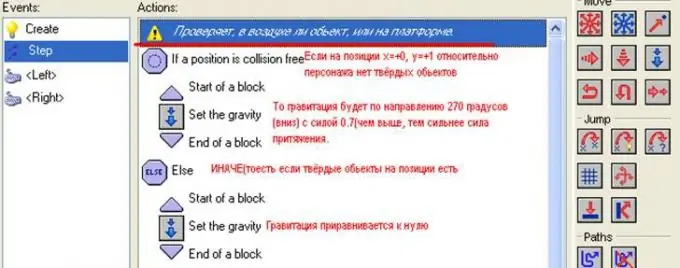
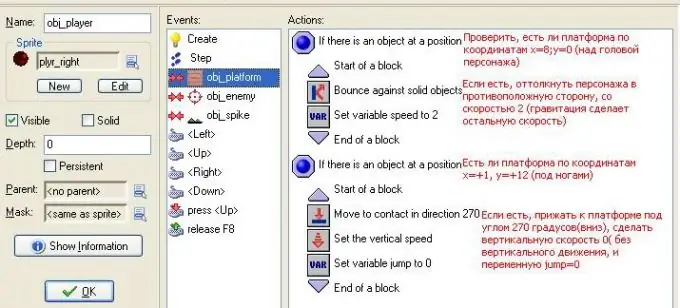
Let's go back to the obj_player character. In the Step menu, select the conditions as shown in the figure.
Notice the variable on the left. With its help, the falling speed can be limited to 12.
Step 4
Bounce
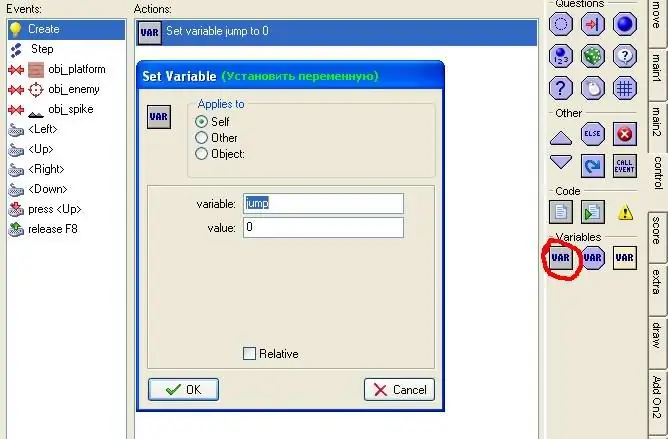
To create a jump, you need to implement the jump variable, with which you can set the maximum number of jumps. In the create menu, create a variable with jump = 0. Variables are created using the button highlighted in red in the figure. When you drag it to Actions, a menu appears. Indicate in it all the necessary conditions, as shown in the figure.
Step 5
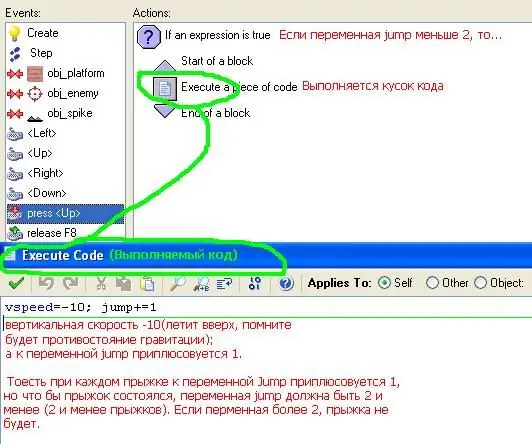
In the press menu, proceed in the same way as in the following figures:
Step 6
And a few more steps in touching the obj_platform object. So, the main engine for our game is ready. It remains to register additional functions.
Step 7
Stairs
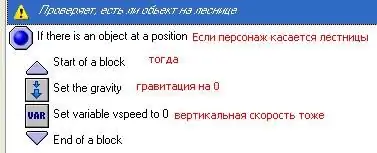
To create the staircase, we need the Up, Down and Step tabs. Create a new object obj_ladder. Next, in the Step tab, put down the values as shown in the figure:
Step 8
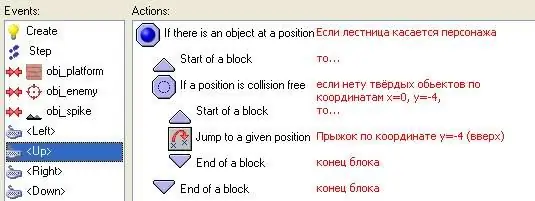
We work with the Up tab (see the picture). We work with the Down tab in the same way, just do not forget to replace y = -4 with y = + 4.
Step 9
Enemy
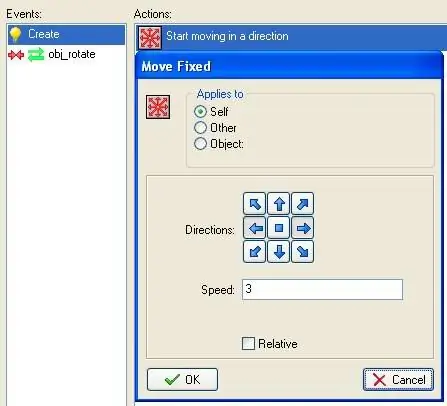
What's a game without a villain? Therefore, our hero definitely needs an enemy. Create a new obj_enemy object, then go to the Create event. There, create an action and set the parameters similar to those shown in the figure.
Next, we create the obj_rotate object and make it invisible. To do this, you just need to uncheck the Visible checkbox.
Step 10
The murder of the protagonist
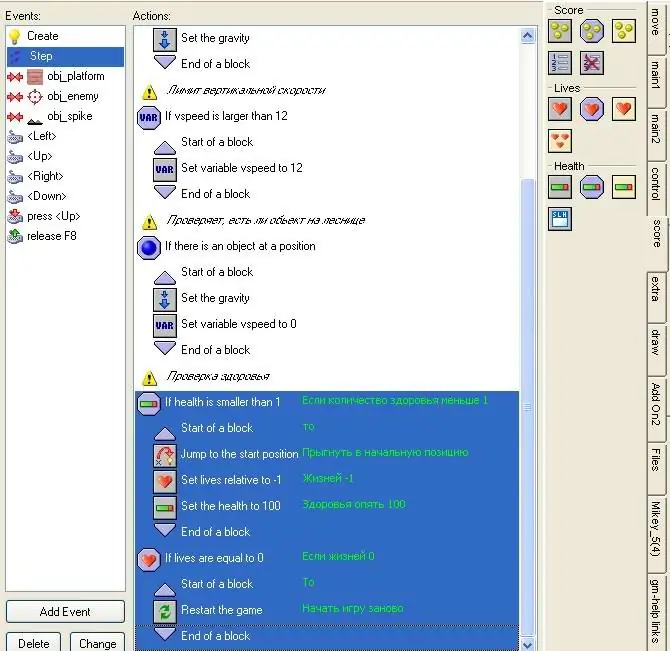
This is the most crucial moment: you need to provide for the possibility of killing the character. To do this, we will use the life and health system that is already built into Game Maker.
In the Step event, take the following steps:
Step 11
Character health.
Make bayonets in the game in the same way as you created the villain. Then put: Set the health relative to -1
Step 12
This will ensure that the health of the game character will decrease with each touch of the bayonets. When health is less than one, the character will burn one life.

Step 13
At the last stage, we will complete some touches: we will make a large level, we will register the possibility of tracking the camera for the hero. To do this, in the room in the views clutch, we take the following actions (see the picture).
Change the values of Hbor and Vbor. They are responsible for the x and y coordinates, upon reaching which the camera begins to move.
These are the basics of creating a simple platformer with Game Maker.


