- Author Lauren Nevill nevill@internetdaybook.com.
- Public 2024-01-18 21:47.
- Last modified 2025-01-23 15:15.
Everything that the visitor sees on the pages of the site is displayed by the browser based on detailed instructions sent to him by the server. These instructions are called the html-code of the page and are made up of separate "tags" that describe the type, appearance and location of each element individually. To place any new element (for example, an image) into a page, you need to add a corresponding instruction - a tag - to its source code. Consider the easiest way to do this.

Instructions
Step 1
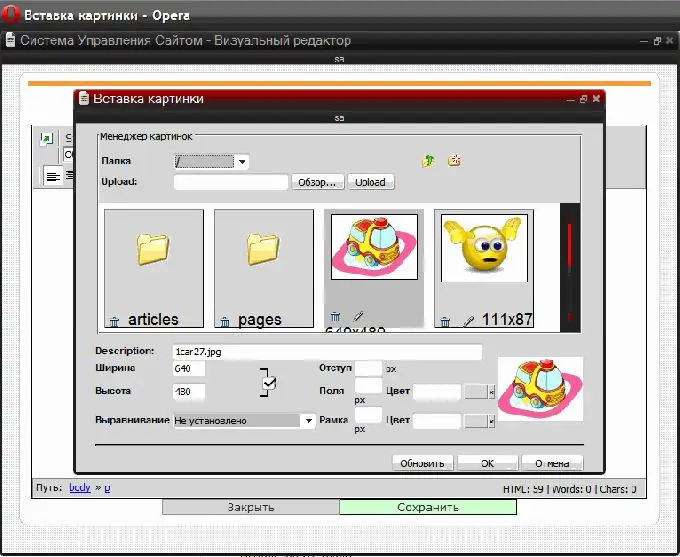
If you use any kind of content management system, then it is very likely that it includes a page editor. First, you need to open the desired page in this editor. Further - options are possible. In the best case, the page editor will have a "visual mode", in other words - "WYSIWYG mode" (What You See Is What You Get - "what you see is what you get"). In this mode, you will not need to deal with the original html-code at all! The page in the editor will look the same as on the site, it will be enough to poke the mouse in the desired place and press the button "insert image" on the editor panel.
Step 2
As a result, a dialog box will open in which you need to select the desired picture. If you haven't uploaded it yet, there is also a button for selecting an image on your computer and uploading it to the server. In addition, in this dialog you can set the color and width of the frame around the image, the distance and fill color between the frame and the image, the text for the tooltip. It is not necessary to specify the dimensions here, but for reasons of speeding up page loading and to prevent distortion of the design, it is still better to do this. When all the required fields of the dialog are filled in, click "OK" and then save the edited page.

Step 3
Due to the fact that there is no single standard for control systems, the procedure for inserting an image in the visual mode of your system may be slightly different, but the principle will be the same. For the same reason, WYSIWYG mode may not appear in your site's management system. Then you still have to edit the source code of the page in HTML (HyperText Markup Language). You will need to insert a tag in the right place in the code that tells the browser to show the image here. In its simplest form, it should look like this: Here is the "relative address" of the image - at this address the browser should contact the server to get the image file from it. If the address is relative, then the browser will assume that the file is in the same server folder as the page itself (or in a subfolder). But, in order not to be mistaken, it is better to specify the "absolute address" - for example, like this: Naturally, in order for the server to find and send the image to the browser, it should be uploaded to the specified location. The easiest way to do this is through the file manager, which is in every content management system, as well as in the control panel of your hosting company. You can also do this using the FTP-protocol (File Transfer Protocol - "file transfer protocol"), using a special program - FTP-client. There are many of them, both paid and free - for example, Cute FTP, FlashFXP, WS FTP, etc. But, of course, installing, mastering and configuring the program will take time, so a file manager for downloading everything you need through a browser is an easier option.
Step 4
In addition to the address in the html-tag of the image, you can specify additional information - "attributes" of the tag. For example, the alt="Image" attribute contains the text for the tooltip that pops up when the mouse is hovering over the image: It can be replaced with the - title attribute: - The size of the rectangle in which the browser should display the image is set by the width and height attributes: - The border attribute specifies the width of the border around the image (in pixels): If the image is made a link, the browser will draw a blue border around it. To get rid of it, set the border value to zero: - The other two attributes contain information about the amount of indentation of the picture from adjacent elements (from lines of text, other pictures, etc.) - hspace sets the size of the indentation horizontally (left and right), vspace - vertically (bottom and top):


