- Author Lauren Nevill nevill@internetdaybook.com.
- Public 2023-12-16 18:48.
- Last modified 2025-01-23 15:15.
The form for the site has become widespread on the Internet. Forms are used to subscribe to news, order books, video lessons, and various materials. Forms are specially limited areas of the site page, in which the site visitor is invited to enter any information or select any specific actions from a number of proposed ones. When creating forms, you can get by with special scripts, but we will write it manually in order to understand the whole technology of work and the structure of the form.

It is necessary
- 1) Html site file
- 2) Knowledge of the basics of HTML
- 3) Knowledge of PHP basics
Instructions
Step 1
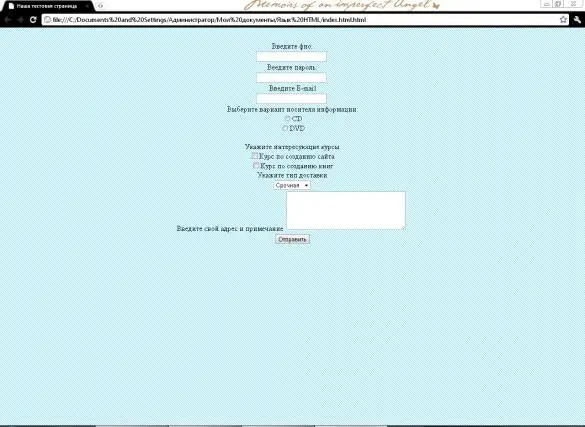
Let's start creating a form on the site. The form will be of the following sample: name, password, e-mail address, data carrier, type of course. Those. the form will be for subscription to video courses.
Open the html file and start entering the code. The tag responsible for creating the form is "form". We write the tag along with the attributes "form action =” obrabotka.php”method =” post”name” forma1”". Let's start creating form elements. Almost all elements are made using a tag, and its “type” attribute, which is responsible for the data type, for example, text, password, and so on. We always give the name “name“to any of the attributes.
We prescribe: "br" Enter the name: "br"
"input name =" fio"
"br" Enter password: "br"
"input name =" pass"
"br" Enter E-mai: l "br"
"input name =" email ".
Step 2
Next, we create a radio button selection element. A radio button is a form element that, when pressed with the cursor, turns on, and other radio buttons are turned off. Let us explain with an example of our form. When ordering a course, the choice will consist of either CD or DVD discs, so you need to choose one. The attribute element “type” - “radio” is responsible for creating such a button. We will write the same name for the media type, so we will specify the “value” attribute so that the handler can accurately determine the value of the variable. We register the code: "br" Select the option of the storage medium: "br"
"input name =" disc "value =" cd " CD "br"
"input name =" disc "value =" dvd " DVD "br"
If the “value” attribute is set to the text, then the form will immediately display the value that we assigned to this attribute. For example, so that in the form of the full name there is already some name (value = "name").
Step 3
Let's move on to creating a form element in which you can make several choices. Such elements are made using type =”checkbox”. We register the code:
"br" Indicate courses of interest "br"
"input name =" ch1 "value =” yes”" Course on creating a site "br"
"input name =" ch2 “value =” yes”" Book making course "br"
If you want, you can put some default checkbox, for this we just write the word cheked in the "input" tag. We prescribe (value = "yes") as indicated in the code, so as not to get confused when creating a php file.
We immediately register the type of delivery using the "select" tag:
Specify the type of delivery "br"
"select name =" delivery"
"option" Urgent
"option" Normal
"/ select" "br"
Next, we make a field for comments or user address. The tag "textarea", the attributes of this tag are "rows" and "cols", which are responsible for the size of this field.
Enter your address and note
"textarea name =" add_text "rows =" 5 "cols =" 30"
"/ textarea"
Create a submit button using familiar tags: "input value =" Submit " Don't forget to close the "form" tag

Step 4
We start creating the obrabotka.php file, open and register
? If (! Isset ($ ch1)) {$ ch1 =” no”;}
If (! Isset ($ ch2)) {$ ch2 =”no”;}
mail ("recipient's mail", "subject (ordering a disk, for example)", "the content of the letter, (a person named $ fio who specified the password $ pass, indicated his email address - $ email, chose the media option $ disc, indicated what he wants to see on the disk the following courses: / n course on creating a website - $ ch1 / n course on creating books $ ch2, indicated the type of delivery - $ delivery, indicated $ add_text as the home address and notes.)”); ?"
The form is ready.


