- Author Lauren Nevill [email protected].
- Public 2023-12-16 18:48.
- Last modified 2025-01-23 15:15.
VKontakte groups are communities of social network users or representations of various organizations and companies. They help organizations spread news, provide support to customers and employees, advertise promotions and events, and solve various problems. The beautifully designed group makes it easy to navigate through the materials and uplifts the mood of the visitors.

It is necessary
Computer, Internet, account in the social network "VKontakte", Adobe Photoshop or another graphic editor with the necessary functionality, basic skills of working with Photoshop
Instructions
Step 1
First of all, create a new group if you don't already have one. To do this, by clicking on the item "My groups" in the side menu, go to the page "Communities". Click on the Create Community link here. In the window that appears, enter the name of the group and click the "Create community" button. This completes the creation of the group.
Step 2
Now the group you just created needs to be configured. To do this, fill in the information fields on the "First edit" page and include the blocks you need. If you have not yet decided on the settings, you can skip this step and return to them later by clicking on the "Community Management" link located in the main menu of the group. But to create a beautiful design, be sure to turn on the "Materials" block.
Step 3
The base of the beautiful design of the group is its avatar and menu-picture. To create them, you need Photoshop or another graphics editor. In the process of creating a design, there are three main stages: creating and preparing the necessary images, uploading them to a group and creating a working menu using the VKontakte wiki markup. Accordingly, start by launching Photoshop and creating an avatar.
Step 4
For an avatar, you can create any composition, but its height must be less than 800px (pixels), and its width must not exceed 200px. Larger images will be reduced by VKontakte when loading.
Step 5
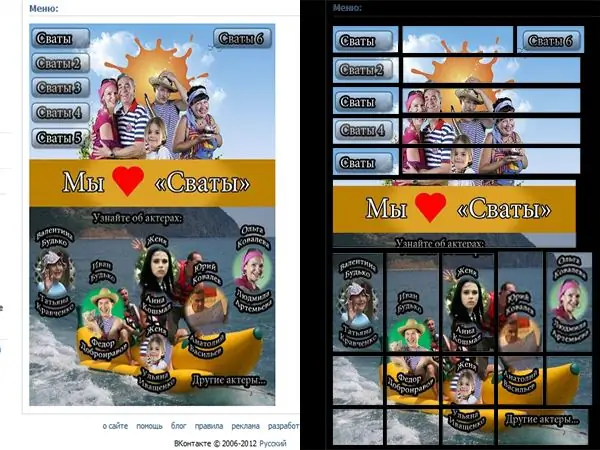
Next, create a menu. The menu of the Vkontakte group consists of several pictures, closely fitted to each other so that it seems that they form a single whole. With the help of wiki markup, each individual image is assigned a page that should be opened when clicking on it.

Step 6
To achieve this effect, first create one large menu picture in the editor as a whole. It shouldn't be wider than 370px. Pick a background, draw buttons on it and sign them with the names of the sections you need. And then split this image into separate parts.
Step 7
When the menu and avatar are ready, start uploading images to the site. To upload an avatar, click the "Upload a photo" link located on the group's main page. When uploading, set a section of the avatar that will be the group icon. Then load the fragments of the menu into a separate album and start assembling it.
Step 8
To assemble the menu, click on the "Edit" link that appears when you hover the arrow over the "Fresh news" item. In the top field of the opened page, enter the name of the menu. A large field is for entering wiki markup and creating the menu itself or other materials.
Step 9
Enter the code for each menu fragment in the input field of the wiki markup according to the following template:
[photo- | xpx; noborder; nopadding | https://vk.com/pages? oid = - & p =]
Here all the elements enclosed in need to be replaced with real values for your menu:
-
- this is the ID of the image, which can be viewed in the address bar by clicking on the desired fragment of the menu in the album.
- and - the width and height of the fragment picture.
- - ID of the group being drawn up. It can be viewed directly in the address bar of the menu editing page.
- - the name of the page that the button will point to. All spaces in the name must be replaced by a subscript.
You can get detailed information on wiki markup by clicking on the link on the edit page - “Markup Help”.
Step 10
At this stage, you will receive a beautiful menu and avatar for your group. Also, to create a beautiful design, you can use spoilers, text formatting, tables created using wiki markup.


