- Author Lauren Nevill [email protected].
- Public 2023-12-16 18:48.
- Last modified 2025-01-23 15:15.
The most obvious way to protect a page from unwanted visitors is to set an access password. This can be done both by means of any of the server scripting languages, and by standard means of the Apache web server. The second option does not require knowledge of programming languages, so we will consider how to protect a page using the capabilities of a web server.

Instructions
Step 1
First, create a separate folder on the server for the pages to be protected, and move all protected pages there. If all pages of the site are subject to protection, then this step can be skipped.
Step 2
The protected folder must contain a file named.htaccess containing instructions for the web server. The server software, when requesting a document from a folder (web page or any other file), will follow the directives from the.htaccess file. It should contain instructions to require an unauthorized visitor to enter a username and password. Create an empty file in any text editor (standard Notepad is fine) and enter the following directives into it: AuthType Basic
AuthName "This page is protected!"
AuthUserFile /usr/your_host/your_site/.htpasswd
require valid-user The first line (AuthType Basic) tells the server that documents for this and all subfolders should only be served to an authorized visitor. The second line (AuthName "This page is protected!") contains the text that will be displayed on the input form login and password. Enter the text that you need without using quotes ("). The third line (AuthUserFile /usr/your_host/your_site/.htpasswd) contains the path to the file that stores logins and passwords for authorizing visitors. This must be the" absolute path "- from the root directory of your account on the server indicating the full directory tree. On web servers hosting Internet sites, it usually looks like / pub / home / account_name / folder_name / file_name. The full path to your site from the server root can be You can find it out in the administration panel of the site. / password for access to documents in this folder is not required from the visitor. In a more complex version, this directive has the ability to specify the requirement that the user (more precisely, his login) belong to Any specific group. For example, you can divide users into administrators and ordinary users. Each such group can have different rights to access documents in different directories.
Step 3
Save the created file as.htaccess. To prevent the text editor from automatically adding the.txt extension when saving the file, select "All files" in the "File type" drop-down list of the save dialog.
Step 4
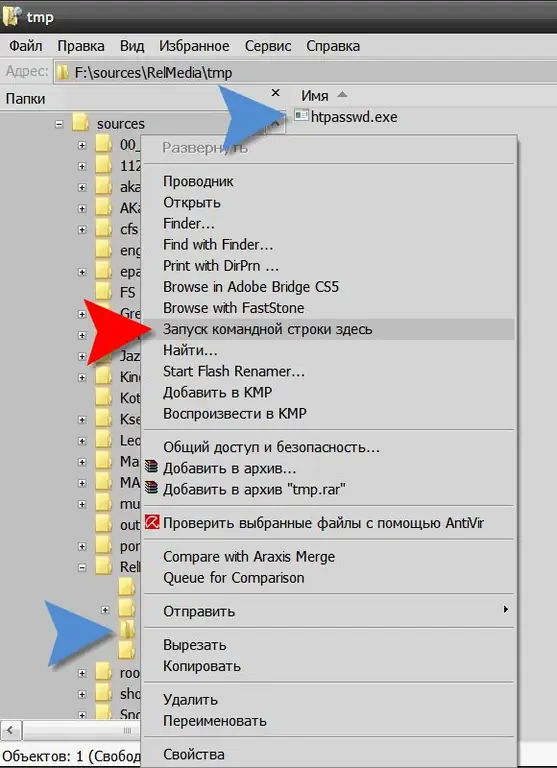
The file containing passwords for authorizing visitors is usually named ".htpasswd", but this is not a mandatory rule - you can give it other names as well. To create this file you need to use a special program called htpasswd.exe. This is necessary because passwords in the file are stored in a specially encrypted form - this is what the program does by creating the.htpasswd file. If an Apache server is installed on your computer, you can take the program from the usrlocalapachein folder, if not - for example, here - https://www.intrex.net/techsupp/htpasswd.exe Run the password file generator from the command line. In Windows XP it is convenient to do it like this: place htpasswd.exe in a separately created folder, right-click the folder and select "Run command line here" from the menu that appears. In the command line terminal, enter: htpasswd -cm.htpasswd user_1htpasswd here is the name of the program to run; -cm is a modifier indicating that a new password file should be created;.htpasswd is the name of the file to be created; user_1 is the username of the user who will be added to new file Press Enter and you will be prompted to enter and confirm a password for user_1. After entering and confirming the password, the program will create an.htpasswd file in its folder containing one username / password pair. To add the following users to the created file in the command line terminal, repeat the same procedure, but instead of the -cm modifier, enter only -m. It is possible read a fairly detailed help on the htpasswd.exe program, if you enter: htpasswd.exe /

Step 5
Upload both created files (.htaccess and.htpasswd) to the server of your site through the file manager of the administration panel or any FTP client. The.htaccess file should be placed in the same folder where the protected pages are stored. And the.htpasswd file must be saved in the folder, the path to which you entered for it in htaccess. As a rule, password files are stored in a directory located one level above the root folder of the site. This is done so that the file cannot be accessed from the Internet.


